 with
sPatch
with
sPatchsPatch ![]() is a nice spline based modeler. I really like that modeler because it doesn't
overflow you with thousands of functions but still provide the necessary
tools to create interesting objects. Because it is spline based it especially
good for bio shapes and curvy objects. Moreover, it can export your work
as VRML, DXF or POV files. The latest is especially interesting cause the
output is not a triangle mesh but a union of bicubic patches, which means
the curves remain smooth during rendering. But a quick tutorial being worth
1000 pages of words ... let's get busy and quickly model a nice and curvy
object! mmmm ... I feel thirsty somehow ;-) so lets create a bottle of
coke!
is a nice spline based modeler. I really like that modeler because it doesn't
overflow you with thousands of functions but still provide the necessary
tools to create interesting objects. Because it is spline based it especially
good for bio shapes and curvy objects. Moreover, it can export your work
as VRML, DXF or POV files. The latest is especially interesting cause the
output is not a triangle mesh but a union of bicubic patches, which means
the curves remain smooth during rendering. But a quick tutorial being worth
1000 pages of words ... let's get busy and quickly model a nice and curvy
object! mmmm ... I feel thirsty somehow ;-) so lets create a bottle of
coke!
Phase 1:

 |
I open a new document under sPatch.
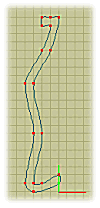
I set a value between 0.250 or 0.100 for the grid . Then I enable the grid. Now using the add tool To avoid that my future lathed surface self intersect
I use the peak tool |
 |
| Now I disable the grid.
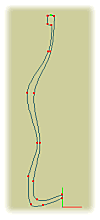
If necessary I use the add tool |
 |
  |
I change the lathe setting to a fairly high
and even value (something like 30 or 32).
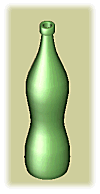
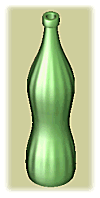
Then I use the lathe tool I select all the points (Ctrl-A) and use the scale tool A shaded preview show that my bottle doesn't look bad but is still too smooth. It lacks these characteristic grooves to really be recognised as a coke bottle. Note: Use the view tool |
 |

 |
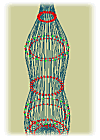
I now want to create the relief on the bottle
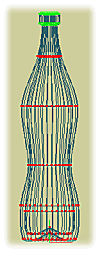
surface. To achieve this I need to apply the scale tool Tip: selecting these points is the only
difficult part of this tutorial. My method is to select all the point at
first (Ctrl-A) then to use the group tool I switch off the Y axe and scale down this selection very slightly to obtained the wanted groovy aspect. I make sure the scaling is small enough to avoid the inner surface to intersect with the outer surface. The shaded preview now show a much more convincing coke bottle with grooves that catch the light and create nice highlight and reflections. |
 |
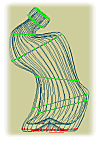
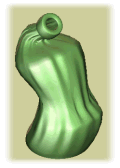
| Just to explore the possibility of sPatch lets try to
make this bottle melt under the very very very hot sun of Scotland!?!?!
;-)
I select only the neck of the bottle with the group tool I repeat these three operation till my selection include
the entire bottle except the base. At this stage the coke bottle look quite
melted but still a tad too regular. Checking than I don't create intersection
between inner and outer surface I use the noise tool |
 |
Add-on note: This
tutorial was the result of my first experience with sPatch. It generates
a large number of patches and I don't recomment you try to render a scene
with several of these bottles under POV unless you have lots of RAM.